
How to Install Rubber Tiles in Heavy Weight Zones?
Heavy lifting areas take a beating. If rubber tiles aren’t installed correctly, they shift, crack, or create safety hazards.
To install rubber tiles in heavy weight zones, prepare the subfloor, choose the right adhesive method, and follow edge-securing techniques to ensure a stable, shock-absorbing surface.
Correct installation is just as important as the product itself. Whether you’re a gym owner or contractor, following a solid process ensures the flooring performs for years — not just months.
👉 Learn more about composite gym tiles or rubber roll options if you’re planning a multi-zone facility.
Why is Proper Installation So Important?
Heavy weight areas are high-risk zones. The flooring must handle dropped weights, constant foot traffic, and intense movement.
Without proper installation, rubber tiles in weight zones can shift or lift under pressure, causing injury risks, noise, and reduced durability.
A bad floor = lost clients, safety problems, and high repair costs
Even the best rubber tiles — like our composite or tiny granule tiles — won’t perform if they’re poorly installed.
| Problem | Cause | Solution |
|---|---|---|
| Tile movement | Loose layout | Use glue or dowel system |
| Curling edges | Poor acclimation | Let tiles rest 24h before install |
| Gaps between tiles | No border support | Use edge ramp + tight layout |
What Tools and Materials Do You Need?
You’ll need rubber tiles, utility knife, adhesive (if used), straight edge, measuring tape, roller, and cleaning tools for dust removal.
Required Tools & Materials
| Item | Purpose |
|---|---|
| Rubber tiles | Flooring surface |
| Utility knife | Cut edges and fit tiles |
| Measuring tape | Ensure proper layout |
| Chalk line | Mark straight rows |
| Rubber mallet | Tap tiles into place |
| Floor adhesive | Secure tiles if glued |
| Floor roller | Press tiles flat |
| Edge ramps | Finish and secure perimeter |
| Neutral pH cleaner | Clean subfloor and tiles |
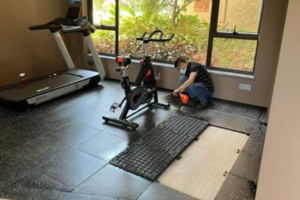
What are the Step-by-Step Installation Methods?
The key steps are: surface prep, tile layout, fixing (glue or interlock), rolling, and edge securing.
✅ Step 1: Prepare the Subfloor
- Clean the surface (dust, oil, bumps)
- Ensure levelness: ±2mm across 2m
- Let tiles acclimate for 24–48 hours
🧠 Tip: See subfloor prep guide for detailed moisture tests.
✅ Step 2: Layout Planning
- Measure and mark center lines
- Dry-lay tiles to match colors
- Stagger seams in a brick pattern
✅ Step 3: Choose Installation Method
| Method | When to Use | Notes |
|---|---|---|
| Loose lay | >30mm thick, tight perimeter | Easy to replace |
| Partial glue | 20–30mm, moderate traffic | Glue seams only |
| Full glue | <20mm tiles, heavy commercial use | Strongest hold |
| Dowel pin | For Lanhe composite tile system | Fast and semi-permanent |
🧪 Use polyurethane adhesive for best bond under pressure zones.
✅ Step 4: Edge Finishing
- Install rubber edge ramps
- Use trim bars or wall transitions
- Leave 5mm expansion gaps
✅ Step 5: Roll and Set
- Use 50kg floor roller
- Walk or place weight across tile grid
- Let adhesive cure 24–48 hours
How to Maintain the Installed Area?
Clean with neutral pH cleaner, avoid soaking, and inspect seams monthly to prevent lifting.
🧼 Maintenance Checklist
| Task | Frequency |
|---|---|
| Vacuum & Mop | Daily |
| Deep Cleaning | Weekly |
| Seam Inspection | Monthly |
| Replace Damaged Tiles | As needed |
| Re-glue Edges | Every 6–12 mo |
📘 See our rubber floor maintenance guide for full instructions.
Conclusion
A heavy weight zone needs more than thick tiles. It needs proper installation to ensure the floor stays safe, level, and strong for every drop, lift, and workout.
✅ Explore More from Lanhefloor
- Composite Gym Tile Series
- Tiny Granule Tile Series
- Rubber Floor Cleaner
- Gym Rubber Roll Options
- Installation Guide Library
💬 Need help with a project?
📧 Email us at info@lanhefloor.com or request a quote here