
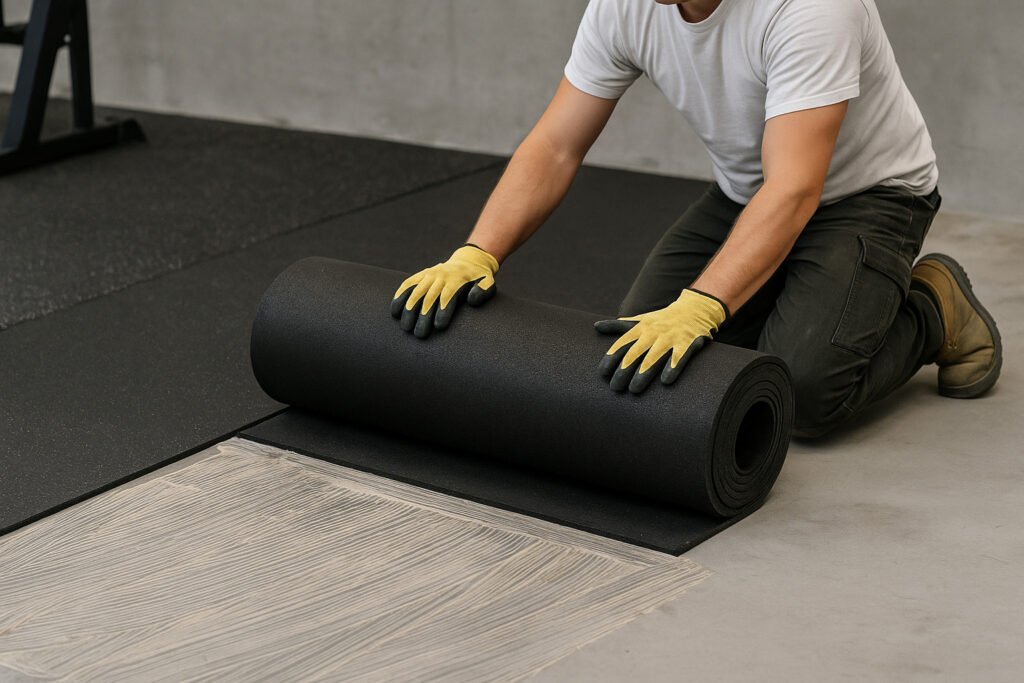
How to Install Gym Rubber Roll Flooring Correctly?
Bad installation leads to curling edges, gaps, and bubbles.
Installing gym rubber rolls properly is the key to safety, durability, and a seamless look.
Proper installation helps reduce maintenance issues in high-traffic gym zones.
Why Choose Rubber Roll for Gyms?
Rubber rolls offer flexibility and seamless visual appeal. They’re ideal for large open gym areas and cardio zones.
They create a smooth, cohesive surface with fewer seams and faster installation time.
Typical applications for gym rubber rolls:
| Area | Recommended Thickness | Feature Summary |
|---|---|---|
| Yoga / Stretching | 4–6mm | Comfortable underfoot, sound-absorbing |
| Treadmill Area | 6–8mm | Anti-slip, shock-absorbing |
| Cardio Equipment | 6–10mm | Durable, seamless surface |
| Locker Room / Hall | 4–6mm | Easy to clean, aesthetically uniform |
Compared to rubber tiles, rolls minimize visible joints and create a high-end gym look. Learn more about gym rubber tile options.
What Are the Correct Steps to Install Rubber Rolls?
Installing rubber rolls requires careful prep, glue application, and joint sealing.
We recommend full-surface gluing using two-component PU adhesive for long-term stability.
Step 1: Surface Preparation
Make sure the floor is clean, dry, flat, and dust-free. Concrete or terrazzo surfaces are ideal.
Step 2: Pre-lay the Rolls for 48 Hours
Unroll the rubber rolls and leave them flat onsite for at least two days. This allows the material to relax and prevents curling during installation.
Step 3: Measure and Mark
Plan layout direction and orientation. Always lay rolls facing the main light source for best visual results.
Step 4: Pre-cut and Dry Lay
Cut rolls to size and dry-lay them to confirm fit and alignment.
Step 5: Full-Surface Adhesion with PU Glue
Use a two-component polyurethane adhesive (typical 5:1 ratio), apply evenly, and press rolls immediately with a roller.
Step 6: Seam Treatment
Tightly press roll seams. Cold weld or seal with welding cords if necessary.
Step 7: Cure and Clean
Allow glue to cure 24–48 hours. Avoid walking over the surface. Clean any excess adhesive.
For detailed material specs, visit our EPDM granules page.
Key Installation Tips to Avoid Issues
Even though rolls are easy to install, skipping critical steps can lead to failure.
Avoid mistakes like poor curing, edge lifting, and seam separation.
- Always pre-lay rolls flat for 48 hours before gluing. This prevents curling or edge lifting.
- Avoid cold or humid environments during installation. It affects adhesive curing.
- Do not leave gaps between rolls, but also avoid over-pressing that may cause buckling.
- Mix glue components thoroughly, following manufacturer ratios.
- Use metal edging or wall return lips to secure roll edges permanently.
- Align color specks consistently for aesthetic uniformity, especially with EPDM blends.
Explore puzzle rubber tile or tiny granule tile options for alternative areas.
Rubber Roll Options from Lanhefloor
At Lanhefloor, we manufacture a range of premium rubber rolls to fit your gym needs and budget.
Visit the full product page here: Gym Rubber Roll
| Type | Material | Density | Benefits | Ideal Use Case |
|---|---|---|---|---|
| Pure SBR | Black recycled rubber | ~1150g/L | Budget-friendly, durable | Budget gyms, basic zones |
| 15% EPDM speckled | Black + color flecks | ~1150g/L | Balanced looks & price | Mid-range gyms |
| Pure EPDM | Full-color EPDM | Up to 1450g/L | Premium look, high durability | High-end chains & studios |
Sizes Available:
- Thickness: 3mm to 12mm
- Width: 1.0 meter
- Length: customizable (8m, 10m, 15m, etc.)
Color options include grey fleck, red speckle, yellow fleck, blue speckle, and more.
Explore our laminated gym tiles or outdoor rubber floors for other applications.
Common Rubber Roll Issues and Prevention
Proper installation prevents most issues like:
- Curling edges from pre-roll tension or poor adhesion
- Bubbling caused by trapped air or insufficient pressure
- Roll shifting due to insufficient glue coverage
- Color mismatch if laying direction isn’t aligned
All can be avoided by following our guide and using quality tools and adhesives.
See how we support clients in real projects: Lanhefloor Project Cases
Conclusion
Choosing the right rubber roll and installing it correctly ensures lasting performance, safety, and a clean gym look. Contact us for custom orders, samples, or wholesale quotes.
Explore our full product range: www.lanhefloor.com
FAQs
1. Should I use glue when installing rubber rolls?
Yes, we recommend using two-component PU adhesive for full-surface glue-down installation. It ensures stability and prevents shifting.
2. Why do I need to pre-lay the rolls before installation?
Rubber rolls are tightly rolled during storage. Pre-laying them for 48 hours allows the material to relax, avoiding curling or air pockets.
3. What thickness is best for gym rubber rolls?
For cardio or yoga zones, 4–6mm is sufficient. For light-weight areas, 6–10mm works well. Heavier zones should consider rubber tiles.
4. Can I install rubber roll over tiles or wood?
We do not recommend it. Best results come from smooth, clean, and dry concrete or terrazzo surfaces.
5. What’s the difference between SBR and EPDM rubber rolls?
SBR rolls are more affordable and durable. EPDM rolls offer better color options, higher density, and longer wear life.