
The Complete Guide to Outdoor Rubber Tiles
Outdoor spaces need more than just hard concrete or asphalt. Safety, comfort, and durability are key when children play, athletes train, or communities gather.
Outdoor rubber tiles provide shock absorption, slip resistance, and weather durability. Choosing the right material, thickness, and installation method ensures performance and safety for years.
This guide covers everything you need to know about outdoor rubber tiles: materials, applications, sizing, installation, certifications, and practical tips.
1. Material Breakdown – What Are Outdoor Rubber Tiles Made Of?
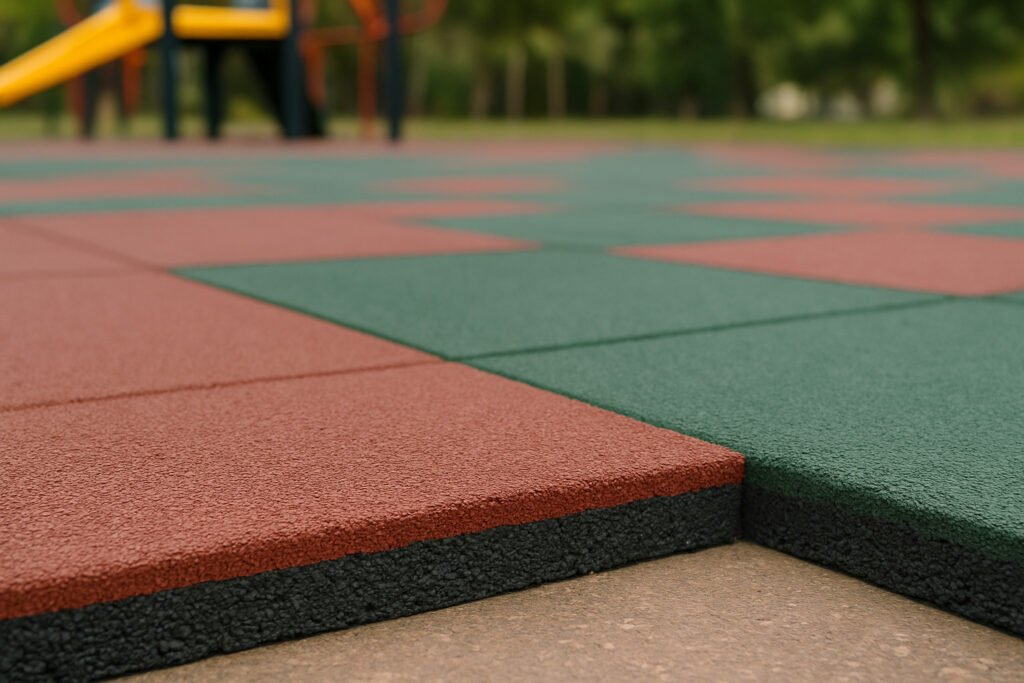
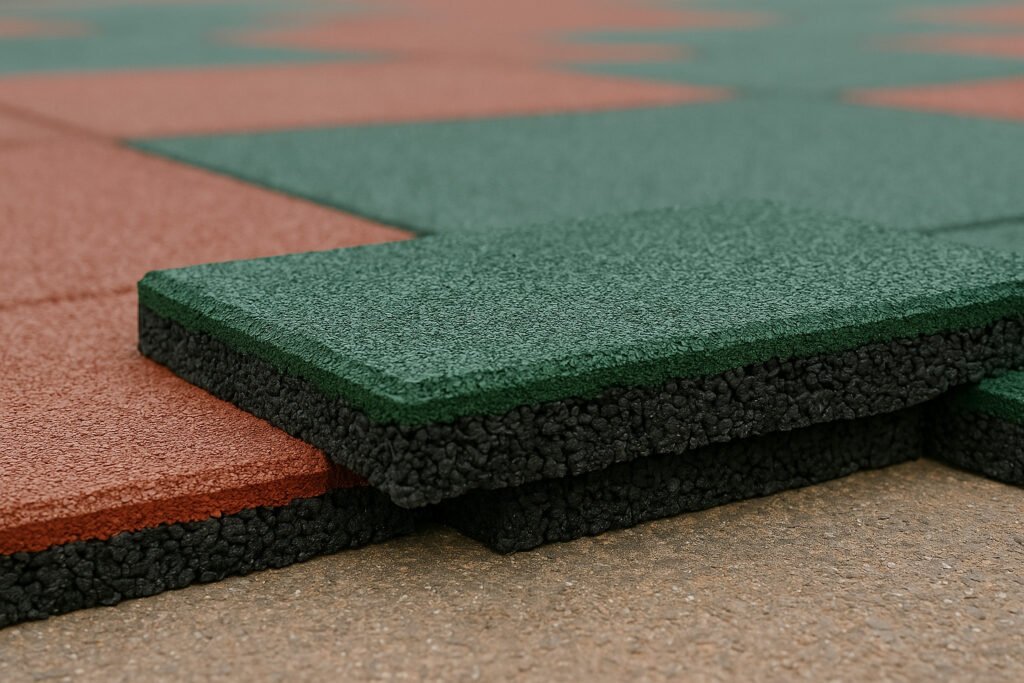
The performance of outdoor rubber tiles depends on their layered structure.
Top Layer Options
- Dyed SBR surface – recommended in brick red or green. These colors are more stable under UV exposure and resist fading.
- EPDM surface – not recommended for areas under constant sun. In outdoor use, EPDM and other dyed colors can fade or flake. This is a common issue across the industry.
Base Layer
- Usually made of black SBR granules with larger particle size.
- Provides stability, strength, and better drainage during rainy weather.
Industry tip: For long-term outdoor exposure, dyed SBR surfaces (especially red and green) are safer choices than EPDM.
2. Applications – Where Can Outdoor Rubber Tiles Be Used?
Outdoor rubber tiles are versatile and can be installed in many areas:
- Playgrounds – safe surface for children, reducing fall injuries.
- School yards and sports fields – suitable for multi-use zones.
- Parks and community walkways – slip-resistant and comfortable for daily use.
- Outdoor fitness paths – shock absorption during jogging or functional training.
- Pet activity areas – easy to clean and resistant to wear.
- Equestrian walkways and stable paths – durable under animal traffic.
Compared to poured-in-place EPDM floors, rubber tiles are easier to install and replace, making them ideal for medium and small projects.
For outdoor flooring alternatives, see 2025 Outdoor Rubber Floor and EPDM Flooring Selection Guide.
3. Size and Thickness Selection
Choosing the right thickness is critical for safety and budget.
- Standard Size: 500×500mm
- Thickness Range: 15mm–75mm
- Recommended Thickness: 30–40mm (balanced for most playgrounds and public areas)
| Thickness | Typical Use Case |
|---|---|
| 15–25mm | Walkways, light-use areas |
| 30–40mm | Playgrounds, schoolyards, fitness paths |
| 50–75mm | High fall height areas, heavy-duty use |
Tiles around 30–40mm are the most common because they balance impact absorption with cost efficiency.
4. Installation Guide – How to Install Outdoor Rubber Tiles
Proper installation ensures the tiles stay flat, safe, and durable. Here’s a step-by-step approach:
- Prepare the base – Concrete or asphalt is ideal. Make sure it is level, dry, and clean.
- Plan layout – Dry-lay tiles first to check fit and alignment.
- Leave expansion gaps – Allow 3–5mm spacing between tiles to prevent edge lifting due to thermal expansion.
- Apply adhesive (if needed) – Use PU glue or strong outdoor adhesive for permanent installations, especially on playgrounds.
- Install edge restraints – Frame the perimeter with borders to keep tiles from shifting.
- Check drainage – Ensure water can flow away; avoid blocked areas that trap moisture.
- Final inspection – Walk across the surface, check for stability, and press down loose edges.
Key tips:
- Never install tiles too tight. Rubber expands in heat.
- Always secure edges, especially in open areas with high foot traffic.
- Allow adhesive to cure before use.
For more installation advice, see How to Install Rubber Flooring on Concrete.
5. Certifications and Safety Standards
Outdoor rubber tiles are often used in public spaces, so compliance with safety standards is crucial.
- EN1177 – fall protection certification, measuring impact absorption.
- CE Certification – ensures compliance with EU regulations.
- Environmental Standards – many projects also require REACH and PAHs testing for safety and non-toxicity.
Always ask suppliers for test reports and certificates. Certified tiles give assurance of safety, durability, and compliance with local regulations.
6. Extended Considerations
- Drainage Performance: The black SBR base layer with large granules improves water flow, preventing puddles and slipperiness after rain.
- Maintenance: Simple cleaning with sweeping or low-pressure water keeps surfaces safe.
- Color Trends: Brick red and green are industry favorites due to stability. Other colors may fade faster outdoors.
- Comparison with Other Surfaces:
- Concrete – durable but hard and unsafe for falls.
- Poured EPDM – bright colors but higher cost, harder to replace.
- Rubber tiles – cost-effective, shock-absorbing, and replaceable.
For a full overview of gym and outdoor flooring, visit Gym Rubber Flooring Knowledge Complete Guide 2025.
FAQ – Outdoor Rubber Tiles
Q1: What is the best material for outdoor rubber tiles?
A1: Dyed SBR (brick red or green) is most stable for outdoor use. EPDM surfaces are not recommended for long sun exposure.
Q2: What thickness should I choose for playgrounds?
A2: 30–40mm is the most common choice, providing balance between safety and cost.
Q3: Why do edges lift up after installation?
A3: Because no gaps were left for expansion. Always allow spacing to prevent this.
Q4: Are outdoor rubber tiles certified for safety?
A4: Yes, quality tiles can meet EN1177 for fall protection and CE for European compliance.
Q5: How do rubber tiles compare to poured EPDM?
A5: Tiles are cheaper, easier to replace, and suitable for smaller areas, while poured EPDM offers seamless looks for large spaces.
For more standards information, visit IHRSA – a global authority on fitness facility safety.
Related Blogs
- Rubber Floor Tiles Buying Guide
- 2025 Expert’s Guide to Rubber Flooring Rolls for Gyms
- 2025 Distribution of Gym Rubber Flooring Suppliers in China
- 2025 Outdoor Rubber Floor and EPDM Flooring Selection Guide
- Complete Guide: Gym Rubber Flooring Knowledge 2025
Conclusion
Outdoor rubber tiles are one of the most practical flooring options for playgrounds, parks, and fitness paths. By choosing dyed SBR surfaces (red or green), the right thickness (30–40mm), leaving expansion gaps, and verifying certifications, you ensure safety, durability, and long-term value.