
How to Install Outdoor Rubber Flooring for Playgrounds and Pathways
Even the best rubber flooring will fail if it’s installed poorly. Uneven surfaces, trapped water, or shifting tiles can cause serious safety issues.
For outdoor playgrounds and walkways, the key to long-lasting rubber flooring lies in proper ground preparation, choosing the right materials, and following climate-conscious installation practices.
Whether you’re building a park, kindergarten, or community pathway, this guide will help you install rubber surfaces correctly and avoid costly mistakes.
What types of rubber flooring are suitable for outdoor use?
Outdoor areas need materials that can handle UV, rain, and daily wear.
Popular options include:
- EPDM Wetpour (poured-in-place granules)
- Rubber Tiles (flat or molded)
- Interlocking Tiles
- Rubber Pavers (bone-shaped or hexagon)
| Type | Best for Areas | Installation Style |
|---|---|---|
| EPDM Wetpour | Playgrounds, schools | Poured, troweled |
| Rubber Tiles | Slides, fitness zones | Dry lay or adhesive |
| Interlocking Tiles | Temporary or DIY zones | Dry lay, no glue needed |
| Bone/Hex Pavers | Pathways, stables, parks | Embedded or framed |
Learn more: Outdoor Rubber Flooring Options
How should the base be prepared?
90% of installation success comes from proper base work.
Recommended base types:
- Concrete slab
- Asphalt
- Compacted crushed stone (for pavers only)
Base preparation tips:
- Must be smooth, solid, and clean
- No cracks or loose gravel
- Slight slope (1–2%) for drainage
- For EPDM: cushion layer under surface (SBR black base recommended)
More on material: https://www.lanhefloor.com/epdm-granules/
Installation Methods by Surface Type
EPDM Wetpour (Poured-in-Place)
- Mix EPDM granules with PU binder (22% ratio typical)
- Trowel over prepared base in layers: base layer + colored top layer
- Recommended total thickness: 10–15mm
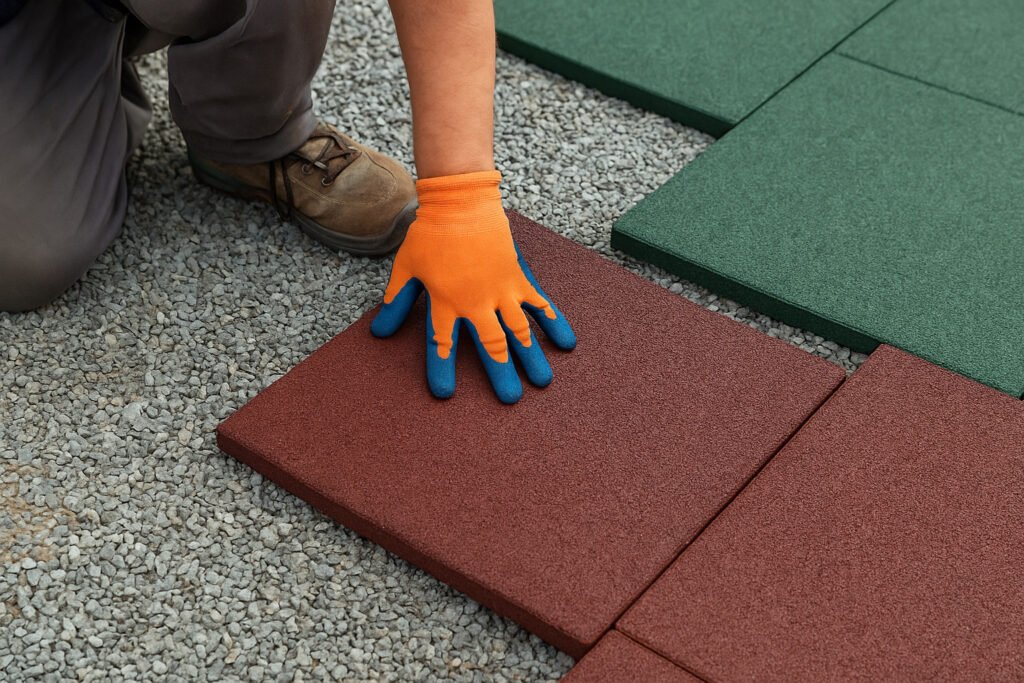
Rubber Tiles
- Dry lay: place tiles tightly with border support
- Adhesive method: outdoor rubber glue applied in dots or full-coverage
- Match tile thickness with zone needs (e.g. 25mm for walkways, 40–50mm under slides)
Explore: Rubber Tile Products
Bone-shaped or Hexagonal Pavers
- Lay over compacted sub-base (sand or stone dust)
- Press fit or tap in with rubber mallet
- Optional: add edging frame or adhesive for extra stability
See example: https://lanhefloor.com/projects/
Common Mistakes to Avoid During Installation
| Mistake | Consequence | How to Prevent |
|---|---|---|
| Uneven subfloor | Tripping hazards, tile gaps | Level and compact surface |
| No drainage slope | Water pooling, mildew | Design base with 1–2% slope |
| Wrong glue or too much | Tile lift, mess | Use proper outdoor-grade adhesive |
| Skipping curing time | Bond failure | Allow full cure (24–48h) |
| Installing in wrong weather | Delayed curing, expansion issues | Avoid extreme hot/cold/wet days |
Post-Installation Maintenance Tips
Once your flooring is in place:
- Avoid foot traffic for 24–48 hours (especially with adhesive or EPDM)
- Sweep debris weekly
- Check seams and edges quarterly
- Clear drainage areas during rainy seasons
Summary
Proper installation is as important as product quality. A solid base, climate-aware timing, and the right adhesives make your outdoor surface safer and longer-lasting.
Related Reads:
- Rubber Tiles vs. EPDM Granules
- Playground Flooring Thickness Guide
- EPDM Rubber Flooring Installation Guide
Explore Lanhefloor for outdoor rubber flooring solutions, installation support, and certified materials for public spaces.